
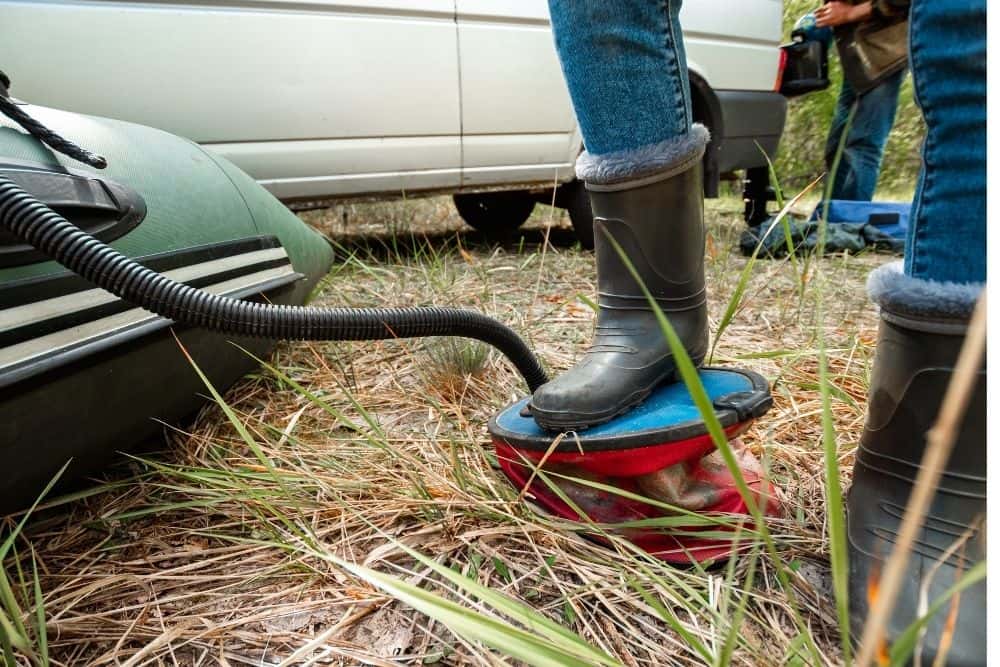
Inflatable boats are an excellent option for those who are looking for a lightweight yet reliable option for out on the water. They’re also not as noisy as traditional boats, which is preferable when trying not to spook fish.
Despite the many advantages, there’s also one major disadvantage – they are prone to leaks and punctures. If this happens, using your boat can be extremely risky and can compromise your safety.
However, this isn’t the end for your boat – it can be salvaged. Instead of spending money on a new boat, you can save your cash and time by investing in a boat sealant.
Don’t worry – you don’t have to do this alone. We have spent hours on thorough research and have gathered all the relevant information to put in a single article for your convenience.
Read on to find out what boat sealant is, how you can use it, and recommendations for the best inflatable boat sealants on the market!
Table of Contents
How To Tell if Your Inflatable Boat Has a Leak
A boat with a leak can be very risky – protect yourself by regularly checking whether your inflatable boat has a leak with the following tricks.
Method 1: Inflating the Boat

In this method, all you have to do is inflate your boat and leave it inflated for some time. If it stays inflated, the coat is clear – if it doesn’t and you are losing air pressure, it’s a sign that you’re dealing with a leak.
Method 2: Using Soap
Another way to check for air leaks is by using a foaming agent. Don’t worry, this isn’t hard to find because it’s a household staple – soap, shampoo, or dish detergent mixed with water is all you need.
Checking Valves
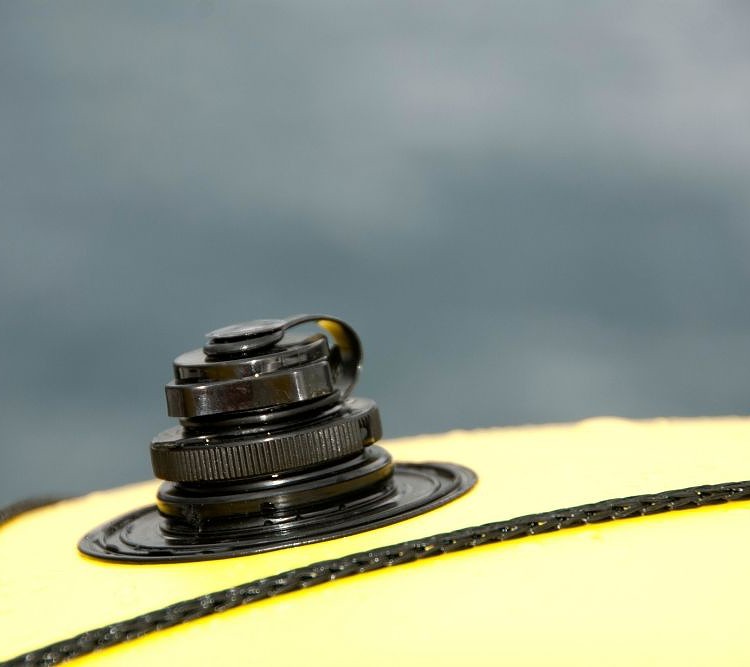

Start off by checking the valves. When you suspect that a certain air chamber is compromised, spray around the valve. If you see bubbles forming, it means there’s a leak.
Slow leaks take between 1-5 minutes to start foaming so wait for the appropriate time to pass before eliminating the possibility for the leak.
If you see bubbles forming, you’ve found your culprit. Be sure to check your valve base and fitting thoroughly to ensure that the valve insert has been screwed on tightly and that the pushpin is in the correct position.
It’s important to make sure that the valves aren’t loose but there’s another factor that may be causing problems – the valves may be dirty. Use this opportunity to make sure that they’re clean. If not, clean them.
Tiny Leaks
")
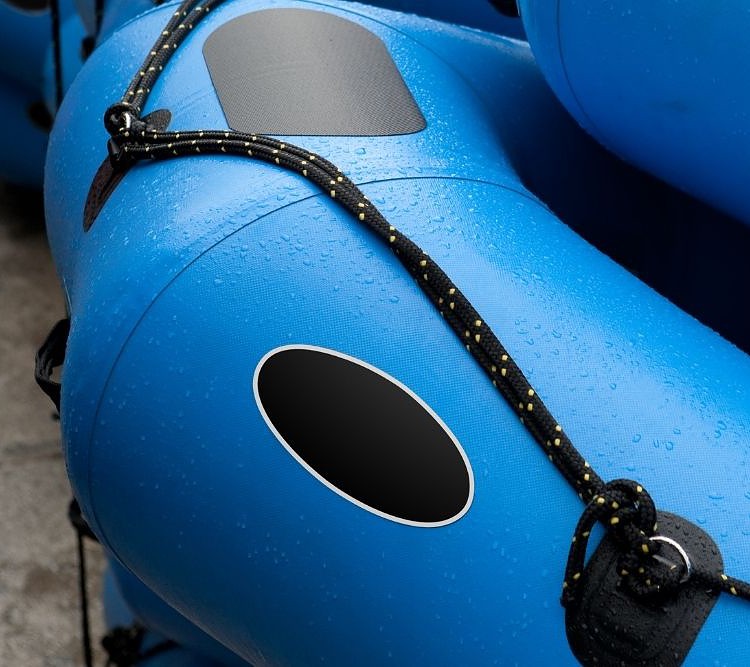
If the leaks are especially tiny, you likely won’t be able to tell which valves to check – in this case, you should cover the entire boat. Remember the seams because they’re a common problem area.
Firstly, make sure the boat is fully inflated – so inflated that it’s hard to the touch. Mix liquid detergent with water to make the solution you’re going to use on the boat.
Now, apply this all over the inflatable boat with a spare cloth or large brush. Look out for bubbles so you can determine where the leak is.
Remember to keep checking even if you’ve found a compromised area because there may be multiple leaks – this way, you only have to do this once instead of over and over again.
Method 3: Listening for a Leak

While the soap method is great for smaller leaks, larger holes are difficult to pinpoint. They leak so much air that bubbles simply don’t form properly.
In this case, you can try to listen for the leak. Fully inflate the boat (as much as you possibly can) and try to listen carefully. You may be able to hear the air leaking.
Now that you’ve narrowed the area down, use the soap method to try and find the exact location of the leak.
What You Should Do After Finding the Leak
If the leaks were caused by loose valves, you can simply fix them and move on. However, when the answer isn’t so simple, it’s best to turn to inflatable boat sealants.
Deal with this problem by following the steps outlined in our comprehensive guide to inflatable boat sealants!
What Is Boat Sealant and How Does It Work?
So, what exactly is boat sealant? The answer is simple – it’s a sealant that is specifically made to stop existing leaks and prevent future leaks in inflatable boats.
Usually acrylic- or latex-based, the sealant is used on the interior of the boat and cures to adhere to the boat, fixing any leaks and holes. It’s suitable for PVC and some other fabrics and is convenient because most products are quick-drying and long-lasting.
 – Permanent Bonding and Sealing for Boats and RVs – White – 3 Ounces")
When you use the sealant on the inside of the boat, it forms a bond that strengthens the material. This, in turn, blocks the puncture, stops the leak, and prevents future leaks from developing in the first place.
Because the sealant is used on the interior of the boat, there’s no danger of finding the marks outside – your boat will look just as good as before! Trust us – we’ve been there and back with the help of sealants.
How Do You Seal an Inflatable Boat?

While exact instructions vary from product to product, most products generally follow a similar pattern.
Instructions vary according to the number of people lifting the boat, so we have included two sets of instructions – one for multiple people, and one for individuals on their own.
Multiple People
- Completely deflate the boat
- Inject the sealant inside the boat through the valves into each air chamber
- If necessary, you can use a small funnel to do this
- Ensure that the sealant is distributed easily between the different air chambers
- Re-inflate the boat, making sure that it’s hard to the touch
- Make sure that there are two people on each end of the boat
- Raise the stern and hold it to a 45-degree angle for approximately 10 seconds.
- Rotate the boat lengthwise and keep raising each end
- Repeat this process by rotating the boat 5 degrees at a time
- Once the entire boat has been rotated, you can stop and let it dry for the period of time suggested (usually 24 hours).
One Person
- If you’re carrying this task out alone, deflate the boat and lay it flat on the ground
- Inject the sealant inside the boat through the valves into each air chamber
- To make sure that it is distributed evenly, step on the air chambers so that the top and bottom meet
- Instead of walking, you can also use a garden roller to roll over the air chambers
- Walk/roll over the entire boat twice
- Re-inflate the boat to the point that it’s rigid
- Let it sit for 3 hours
- After 3 hours, inflate the boat fully
- Let the boat dry for the period of time recommended (usually 24 hours)
That’s it – your inflatable boat is as good as new!
Here’s a video that can help you better understand the process.

3 Best Inflatable Boat Sealants
Now that you know what an integral tool boat sealant can be, we can move on to recommendations. We’re not leaving you high and dry – we’ve narrowed down all the options on the market so you can easily choose between the top three.
West Marine Inflatable Boat Sealant
This is truly one of the best inflatable boat sealants on the market and has great reviews. One unique feature about it is that it doesn’t cause stickiness.
Other products may cause the air chambers on the boat to stick together, but the West Marine sealant saves you the trouble and lets you re-inflate your boat with no problems at all.
We also love it because it’s reusable – if, by any chance, you have the same problem again, you can use the boat sealant to revive your inflatable boat yet again.
However, users should note that one quart will only be enough for small leaks on boats that are a maximum of 12’ long – otherwise, you will require more product.
West Marine suggests 0.5 oz of sealant per square foot of material.
Inland Marine Sealant for Inflatable Boats

Inland Marine’s boat sealant is not only easy to use, but also refutes West Marine’s claim of being the only boat sealer that allows reinflation – it also lets you easily deflate and reinflate your boat.
As with our other options, anything larger than a 12’ boat will require more than one quart of boat sealant. However, if there are many slow leaks, you should buy two bottles, and apply two coats, letting the sealant dry between each coat.
For boats larger than 12’, remember that ½ oz of sealant will cover 1 square foot of material.
If instructions are followed correctly, the leaks should be sealed for years to come, making this an excellent investment.
ToobSeal Premium Inflatable Internal Sealant
While other sealants are usually latex-based, ToobSeal is made of acrylic. Because acrylic dries clear, this has the advantage of not yellowing and remaining aesthetically pleasing.
However, you should note that our other options have not mentioned ingredients so it’s difficult to determine whether this is unique to the ToobSeal boat sealant.
Like our other two options, this boat sealant also doesn’t cause stickiness and can be easily inflated and deflated. An added bonus is that it’s self-leveling, so you don’t have to worry about inconsistencies.
However, it does have a unique selling point – it is self-leveling and thus, will be more effective at sealing any leaks.
Another reason we love the ToobSeal sealant is because it has the consistency of water and is easy to spread around so that the entire interior is covered.
Like the other two products, a single quart will only cover 12’ boats or smaller. For larger boats, 3 oz per foot will be required.
Additionally, unlike some other products, the ToobSeal sealant can be used to repair seams if the seam leaks are small and leak slowly. However, if the seam leak is visible, ToobSeal likely won’t work to fix it.
Conclusion
While the products we have mentioned aren’t cheap, they’re not expensive either. Either way, they’re a much more affordable option than springing for a new inflatable boat.
We hope you found this article helpful. In our opinion, all three of our recommendations are very similar and you will be happy with whichever option you choose.
That being said, they are some of the best inflatable boat sealants on the market and are much better than the other options out there.
If you found this article interesting or have anything to add, feel free to leave us a comment – we’d love to hear from you!

I created this site to help people – to help you – with your boat problems. Instead of helping one person at a time, I want this website to be the “one-stop-shop” for everyone’s boating concerns. Read more.