You found the fishing boat of your dreams.
Now you have a great trolling motor too, but this is larger than other trolling motors and you need more voltage.
Here is how to get the voltage of 24 or 36 that you need.
Table of Contents
- What you need
- How many batteries are needed
- How to correctly wire the batteries to each other
- Should you use a circuit breaker or a fuse box?
- How to connect the circuit breaker?
- How to install an inline fuse?
- Where should you put the battery system?
- What if I need my batteries farther from the trolling motor?
- In conclusion
What you need
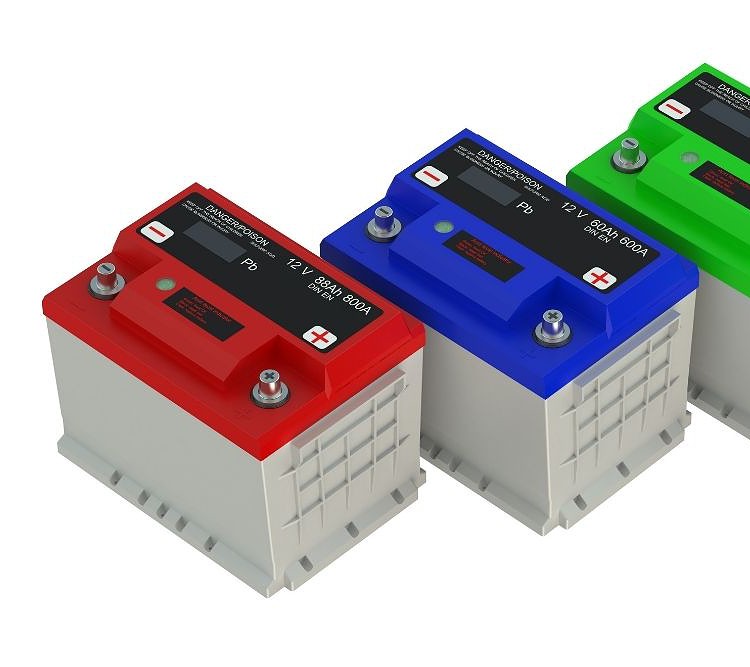
- 2 or 3 12 volt deep cycle marine batteries
- Up to 5 connector cables
- Extender cables may also be needed
- A circuit breaker / inline fuses
- Waterproof battery case/s
How many batteries are needed
To reach 24 or 36 volts, you will need to connect more than one 12 volts deep cycle battery to each other.
You need 2 batteries for 24 volts and 3 batteries for 36 volts.
Make sure your batteries are all the same type and brand.
How to correctly wire the batteries to each other
When wiring the batteries to each other you must use the correct gauge of wire and connect the wires to the proper terminals.
The gauge of wire you need depends on the amperage of the motor.
Check your owner’s manual of your trolling motor to determine the proper size.
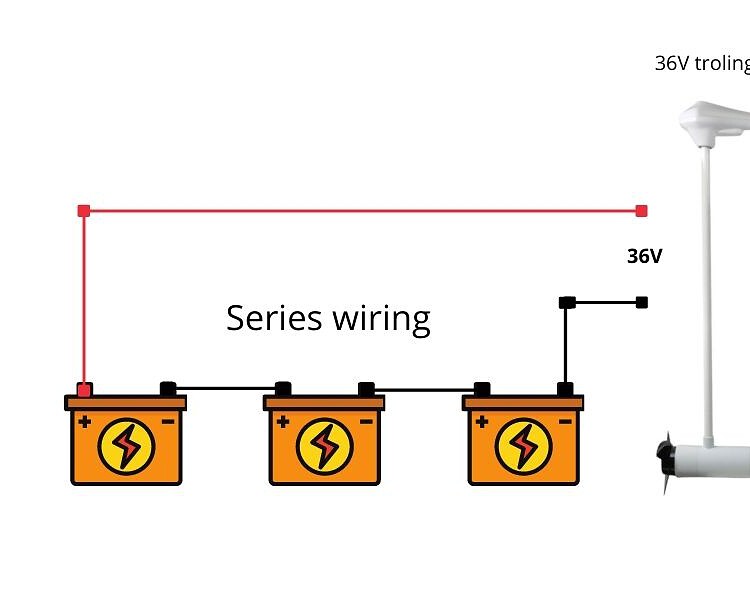
To increase voltage you must use a series connection.
A series connection is made when you connect the wire from the negative terminal of battery 1 to the positive terminal of battery 2.
If you need 36 volts you would repeat the same step. Connect the negative terminal of battery 2 to the positive terminal of battery 3.

When you are done the positive terminal on the first battery should not be connected to anything yet and the negative terminal on the last battery should still be unconnected as well.
You must connect negative to positive.
Connecting positive to positive is a parallel connection and will not increase the voltage, it will simply increase the amount of time your 12-volt battery will run.
Sometimes you can buy a connector harness to connect your batteries. If you do that follow the directions given in the box. In the end, the setup for the batteries will be the same.
Should you use a circuit breaker or a fuse box?
After you have your batteries connected to each other they need to be connected to the motor for everything to work.
Trolling motors are more likely to overload or short circuit while in use than a regular motor.
It is vital that you connect your batteries to a circuit breaker or fuse box as well as to the battery.

It is required by the Coast Guard you have a way to break the circuit for all ungrounded conductors.
You will rarely need a circuit breaker and a fuse box, so whichever you used becomes personal.
Fuses tend to handle more of a power surge before they blow, but if it blows you will have to change the fuse.
This means you need to make sure you have extra fuses with you on every fishing trip.
A circuit breaker costs more upfront, but it trips a switch when it overloads, so nothing needs to be replaced.
How to connect the circuit breaker?

You want to mount the circuit breaker as close to the trolling motor as possible.
Once it is mounted it is easy to connect it to the motor.
- You should connect the connector wire from the positive node on the trolling motor to the AUX/positive node on the breaker.
- Then connect another connecting wire from the BAT/negative node of the circuit breaker to the positive terminal of battery 1.
- To complete the circuit you will then connect the unconnected negative terminal of the last battery to the negative node on the trolling motor.
Here is a diagram of what everything should look like when connected properly.
https://www.trollingmotors.net/blogs/wiring-electrical/86994439-24-and-36-volt-wiring-diagrams
How to install an inline fuse?

An inline fuse is the most common type of fuse used with a trolling motor.
When using a fuse system, make sure your fuse amps are higher than the amps of the trolling motor.
Once you know your amps required and the gauge of wire you need you can then wire up your fuse system.
First, you will need the following materials
- Wire strippers
- Butt connectors
- O ring battery connector
- Wire crimpers
- Hand torch or micro torch
- Electrical tape
- Inline fuses
- Power cable
Now that you have everything you need you can start the process.
First, stripe the wires to about ½ to 1 inch of the plastic covering off both cables of your power wire and all wires for the inline fuse.
Twist the exposed wire ends so they are nice and tight.
Put the positive wire from the power cable into one side of a butt connector crimp down the center part of the butt connector, and make sure you crimp over the inside wires.
Insert one of the wires from the inline fuse into the other end of the butt connector crimp that down as well.
Use a flame from a hand torch on the butt connector to shrink it around the wire by melting the plastics together.
When using the flame move it back and forth if you stay in one place too long you can burn the plastic.
Now, insert the other end of the wire of the inline fuse into an O-ring battery connector and crimp it together. Use the hand torch again to shrink the plastic.
If you want more protection you can cover all your torch plastic with electrical tape.
Place another O-ring battery connector on the exposed end of the negative wire of the power cord. Redo this process of crimping and heating.
Connect the power cord back to trolling motor.
Lastly, connect the o-rings to the battery.
Here is a video to help you.
Where should you put the battery system?

It is recommended that you put the batteries as close to the trolling motor as possible.
If you have them out in the open and not stowed in a compartment then you will need to make sure they are in a waterproof case of some kind.
Many sport outfit stores sell waterproof multiple battery cases. If you have the skills you can also make one yourself.
What if I need my batteries farther from the trolling motor?
Sometimes it isn’t possible to have the batteries close your trolling motor. It depends on the way your boat is configured.
If you need to have the batteries farther away making your connector wires too short then you need extender wires. The extender wires simply connect to the connector wire to give you a longer wire.
Make sure that your extender wires are the same gauge as your connector wires. If they are not it can cause serious electrical problems as serious as fires.
It is also important to waterproof the areas where the extenders contact the connectors. The easiest solution for that is to wrap the contact points in electrical or another waterproof tape.
In conclusion
Now that you have everything connected, test your setup to make sure everything works before going out on the water.
Once everything is tested and works you are ready to get out for your great day of fishing.

I created this site to help people – to help you – with your boat problems. Instead of helping one person at a time, I want this website to be the “one-stop-shop” for everyone’s boating concerns. Read more.

