
Inflatable kayaks may seem fragile but are more robust than you would expect.
These inflatable boats can withstand various weather conditions. It remains as durable as it is portable.
You can ride out the waves and hit a few rocks without worrying about causing any permanent damage.
Your kayak might take a hit against a few rocks with jagged edges, but don’t worry! Punctures are easily mendable with tape and a few other tools.
If you’re looking for an answer to your inflatable kayak’s leak, you’re in luck!
While your kayak might face some hiccups, it isn’t exactly fragile. Let’s explore that further below.
Table of Contents
Do Inflatable Kayaks Puncture Easily?

Inflatable kayaks don’t puncture easily. If we’re talking technicalities, hardshell kayaks are less resistant to punctures.
Yes, aluminum and fiberglass kayaks seem sturdier, and in most cases, they are.
However, they are less resistant to abrasions because of their more significant weight or mass with less flexible materials.
When hardshell kayaks collide with sharp objects, their shells are more easily punctured because of the heavier force of impact.
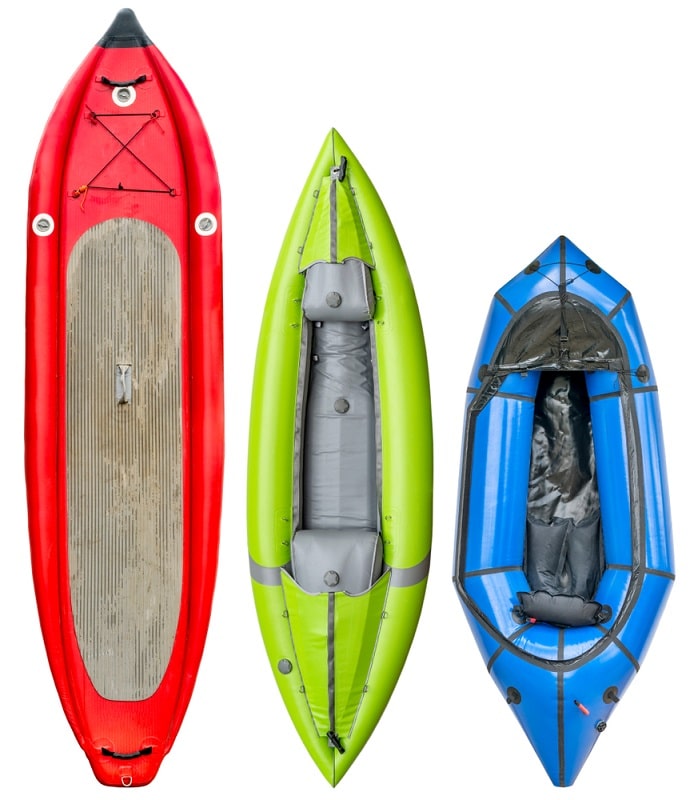
Inflatable kayaks are made with more flexible materials that conform to the shape it hits, better than rigid hard shells made of one-piece fiberglass or aluminum.
Inflatable kayaks are made with flexible yet durable materials like PVC, Hypalon, and/or Nitrylon.
PVC and Hypalon are more traditional, whereas Nitrylon is a more modern innovation for better durability.
PVC

PVC, or Polyvinyl chloride, is the synthetic polymer of plastic. It contains phthalates that increase its flexibility and durability due to its compound of vinyl and plasticizers—inflatables comprised of PVC hold up well against tremendous contact pressure.
PVC inflatables cannot be penetrated by merely poking them with a jagged rock. Maybe, an incredibly sharp needle would work. Even then, you would have to do so strategically.
Inflatables are also reinforced on the inside. It isn’t just one layer of PVC textiles. It’s reinforced with more material inside.
PVC inflatables are definitely stronger than just plastic.
There are more expensive materials that inflatable kayaks are made with, like rubber instead of plastic.
Hypalon
Hypalon is a synthetic rubber introduced by DuPont Inc. It is more durable than PVC and withstands greater amounts of ultraviolet light.
Intense UV exposure can deteriorate all kinds of materials. Even human skin can only resist it for so long before getting burnt.
While PVC can become more susceptible to punctures over time due to prolonged exposure to UV, Hypalon can absorb more before compromising durability against punctures.
Hypalon was unfortunately discontinued in April 2010. However, a newcomer has taken its place and proven to be its rightful successor.
Nitrylon
Most inflatable kayaks made with synthetic rubber are comprised of Nitrylon.

Nitrylon is the coating of another rubber compound, nitrile. It is thousands of times more durable and resistant to scrapes and punctures than Hypalon and PVC.
Nitrylon is used in many other things like gloves and other textiles. It isn’t immune to punctures but more resistant to punctures and abrasions.
It is also easier to patch up than other synthetic rubbers and polymers.
Of the three, PVC is the most widely used because it is the most affordable. As for durability, nitrylon trumps PVC, but PVC weighs less.
Because of nitrylon’s weight, it is mostly used on the exterior of the kayak, reinforcing it against sharp objects.
Given the key selling point of inflatable kayaks is their portability, heavier components can lessen their appeal.
PVC Versus Hypalon/Nitrylon

The great debate among kayak enthusiasts is between PVC and synthetic rubbers. While they each have their pros and cons, which outdoes the other is heavily debated.
PVC is lighter on the water and wallet but less resistant to wear and tear, especially under immense UV exposure.
Rubberized compounds like Hypalon or Nitrylon hold up better against extreme temperatures and potential ruptures but weigh and cost more.
Either make good choices, but you must familiarize yourself with the conditions your kayak will be up against before committing hundreds and even thousands for its purchase.
Remember, neither material is fragile, and any puncture to either is easily remedied.
Before buying a repair kit, ensure there’s a leak that needs remedying.
How to Identify an Air Leak on Your Inflatable Kayak?

The different parts of your kayak can sustain damage that leads to air leaks.
Some damage may be caused by sharp objects, intense heat, and other elements. Your kayak can even sustain a puncture from your outfit and other things you may have onboard in the cockpit.
Seasoned kayakers may be able to spot leaks quickly, but novice kayakers can feel like they’re looking for a needle in a haystack.
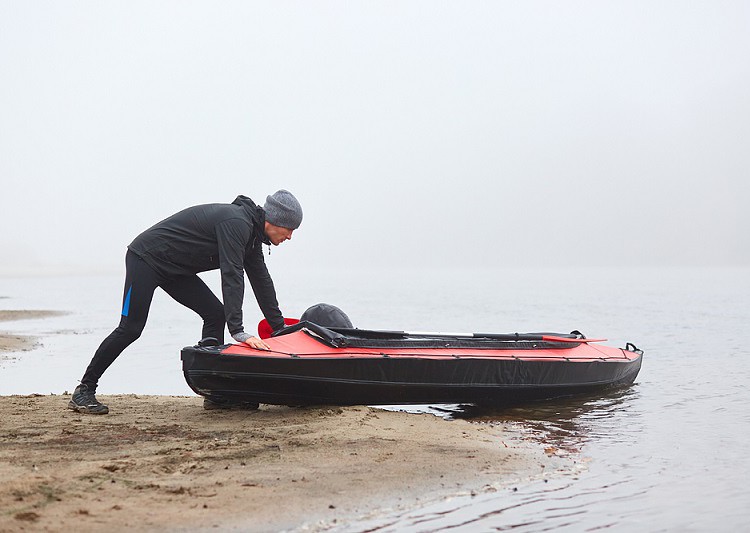
If you are in the water and you feel your boat isn’t performing as it typically does, consider the possibility of a leak immediately.
Maybe your boat feels a little heavier to maneuver, or you think it is submerged a little deeper than when you first got into the water.
Take notice of an increase in weight, water within the boat, and the depth of your submersion.
How to Spot Punctures on Your Inflatable Kayak?

Stop, look, and listen if you are wary about your kayak.
- Stop and take your kayak to shore or back on the boat.
- Look for any visible signs of a puncture or leak.
- Listen for any air-seeping out sounds that may mimic whistling.
If you still can’t find the leak after performing the steps above, here are some proven alternatives you can try:
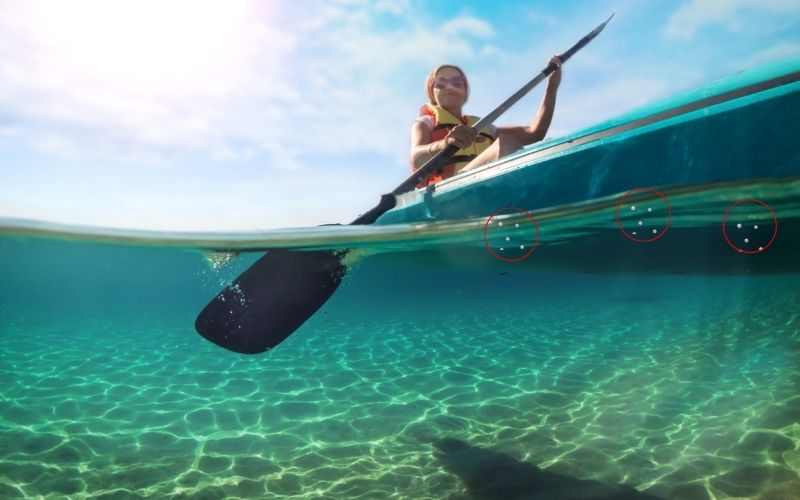
Underwater
This is a wet strategy best for those on a boat, a raft, or any other carrier afloat. It would be helpful if you had someone with you.
Get it back into the water.

Have your partner hold on to the kayak from the ladder or other areas of the vessel closest to the water while you dive underneath.
If you are bringing the kayak into the water from the shoreline, stop where it’s only four to five feet deep.
Wear a dive mask or goggles to examine the kayak’s underbelly.

You and your partner can take turns standing and holding the kayak in place while the other dives underneath.
Look up into its hull.
The hull is the shape of the bottom of the kayak. Some hulls are flat, round, soft, or stern.
An inflatable kayak tends to be harder or more rigid than other regions to provide more stability. While it’s considerably harder than the rest of the boat, it isn’t immune to punctures.
Check for tiny bubbles that gather around a particular area while underwater.
Bear in mind that there can be more than one hole.
Don’t stop searching when you find one hole. Mark it, and move on to find more.
Be strategic in examining each part of the boat and having each other double-check the marked and unmarked areas.
Use a grease pencil.

Mark all the areas you find tiny bubbles gathering.
When it’s your turn to hold the kayak, your partner should examine all the marked areas and add their own markings to indicate verification.
Your partner should also go around all the other unmarked areas of the hull to double-check for punctures you might have missed.
Check the seams.
If it’s not on the hull, check the seams of the kayak that are also submerged in water.
Don’t stop looking for bubbles until you have marked and double-checked all areas submerged in water.
Soap Bubbles

Bubbles are some of the best indicators of leaks.
If you don’t have access to a body of water with the appropriate depth, you can make your own bubbles.
Create a compound with a detergent and water.


The best soap or detergent to use here is dish soap.
It’s effective against germs, grease, and other gunk off your boat but gentle enough on your hands and the boat’s paint.
Take a beaker or any other container and fill it halfway with water. Add half a cup of detergent to the container and stir.
Put your detergent and water compound into a spray bottle.
This works more efficiently with a spray bottle.
If you don’t have any lying around, you can work it into a lather and use a sponge to smear it across your kayak.
Inflate your kayak

Air plays a crucial role here. This trick won’t work without air leaking out of your kayak.
Inflate your kayak to maximum capacity for quicker results.
Create a grid
Segregate your kayak’s surface into smaller sections.
Take a marker, a grease pencil works best here, and draw margins to divide the surface of your kayak into smaller portions.
Dividing up the surface of your kayak into smaller squares helps you cross off sections faster.
Spray your detergent compound onto your kayak.

Take your spray bottle and start spraying!
If you don’t have a spray bottle, take your sponge, dip it into your detergent compound and slide it across a section of your kayak.
If there is a leak in that section, the air exiting the kayak will enlarge bubbles.
Verify the bubbles that begin to form.
This method will expand tiny bubbles into larger ones.
You can verify by popping the bubble and leaning in to listen or putting your hand an inch or two away parallel to the bubbles and feel for any air escaping.
Repeat until you have covered each section.
Mark all areas that render larger bubbles.
For a more hands-on explanation, you can watch a video on how to find leaks on your kayak here:

Now that you have identified where the leak is coming from, you can get to patching it up.
Puncture Repair Kit: What Patch Material Should Be Used?
Different materials require different fabrics and tools to patch up.
Most prominent brands sell kayaks with repair kits included in the package.
The repair kits come with the appropriate tools and materials to patch up your kayak.
If you have your repair kit ready, you can watch the repair tutorial below:

Suppose you’ve run out of the materials provided in the kit. In that case, you can buy replacement kits from the company or store where you purchased your kayak.
It isn’t advisable to buy regular tape and other patching equipment to repair your kayak. Remember, your kayak is used in water and faces other elements that regular putty won’t hold up against.
Don’t use at-home remedies for your kayak. You might do more harm than good that way.
You can buy vinyl patches like the for immediate repairs. Vinyl patches are UV resistant and don’t wash out from being submerged underwater for prolonged periods. You won’t need other tools to patch onto your kayak either.
The Airhead Tear-Aid is a quick repair kit for those who are on the go, and it’s pretty handy to store on your boat or in your car for emergencies.
You can watch how Tear-Air is used to repair an inflatable kayak here:

How to Patch Leaks in Various Areas of Inflatable Kayaks?
Once you’ve located the puncture, mark the area, and deflate your kayak.
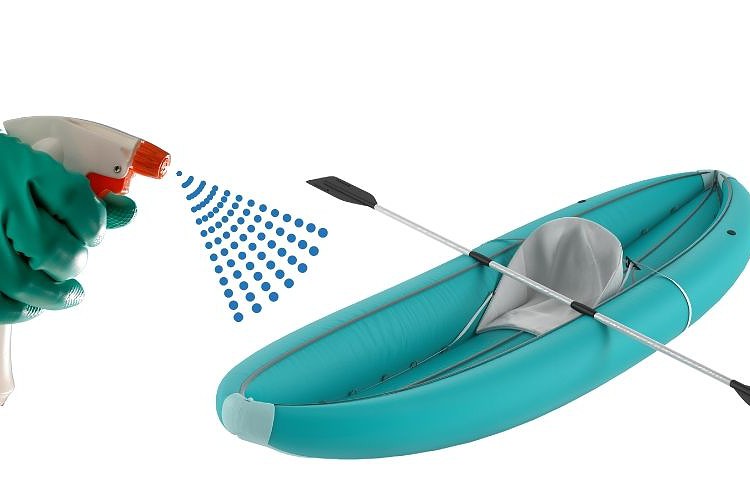
Clean the area by patting it dry and ensuring no dust particles and other debris are surrounding the hole.
Some go as far as taking the kayak off the water and hosing it down entirely. Some of us aren’t as meticulous about it, but whatever floats your boat. Pun intended.
For Punctures Not in the Seam

After it has been pat dry and cleaned out, tear off the back of the quick repair patch and apply it to the hole. Pat down the edges and ensure no air bubbles are caught between the kayak and the patch.
If it’s a quick repair patch like the tear-aid, you only need to keep it dry for half an hour before getting it back into the water.
When using patches from the repair kit that comes with your kayak, you will need to use the adhesive and possibly adjust its size before application.
If you go with the patches provided in your repair kit, you might have to wait several hours for the adhesive to dry.
For Punctures Within the Seam
Now, this may be a little trickier.
Here’s the thing about punctures within the seam, it isn’t going to be as flat or straight-edged.
You might not be able to stick a patch onto the seam as quickly as any other part of the kayak.
Locate the exact area of the puncture. Pat it dry and clean it out.
Next, you will use something you wouldn’t typically use to patch up other regions of the boat.
Instead of using patches, you will need the to patch up the seams of your kayak.

Goop is an adhesive that can firmly plaster anything while remaining gentle on paint jobs. With this gentle and colorless adhesive, you don’t have to worry about your kayak’s textiles.
Its name is cute. Its potential effects on your eyes and skin are not. Do not make skin-to-Goop contact.
Use a to handle the Goop safely.
Take the tube of Goop and squeeze an appropriate amount over the puncture. It hardens pretty quickly, so take the spatula to smear the Goop around.
Covering the hole will suffice, but you can add another layer for your peace of mind.
Goop will need at least overnight to dry out completely. You will notice how tacky it still is after several hours.
Don’t throw it back into the water until it dries out completely.
If you are dealing with punctures on your seam, you can watch how to use an adhesive to patch up your inflatable kayak below:

Another way you can try is to include both an adhesive and vinyl patch.
Remedy for Both Hull and Seam
Here’s a pleasant surprise, you won’t need to locate the puncture area!
That sounds crazy, but you won’t need to find the leak with a liquid sealant. Other boaters prefer to identify where all the leaks are. However, it isn’t necessary for this technique. *
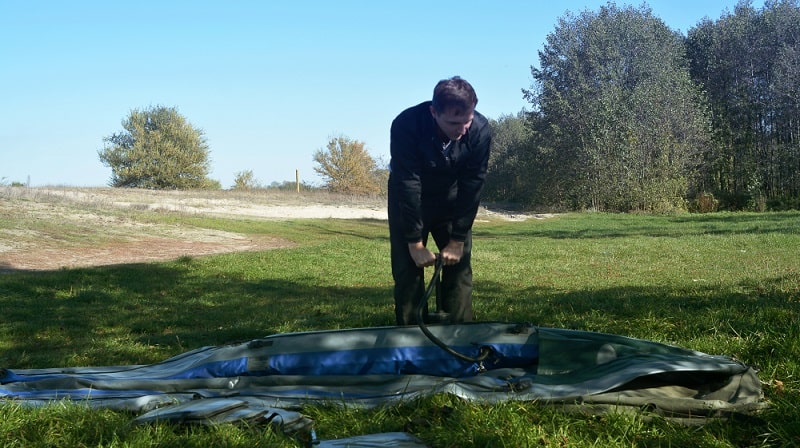
Again, make sure your boat is fully deflated and wash it out completely.
Once the boat is dry, open the valve of your inflatable kayak. Take off every valve component until it’s down to its base, and fill it with a water-proof vinyl and rubber-safe .

Wipe off any excess around the valve and add back its base components until you can attach your pump’s hose.
Connect your pump and inflate your kayak.
Tilt your kayak back and forth, especially in the direction where you know there are leaks. Turn it over and tilt it around again.
Make sure you try your best to get the liquid sealant all over the interior of your kayak.
You will be working somewhat blindly, so take your time tilting it over and around.
Here’s an example of using a liquid sealant to patch up your inflatable kayak without patches.

*should you prefer to know where the leaks are, you can use the soap technique above.
Alternative remedies
Here are some debatable remedies. They are not the most reliable nor permanent fixes, but they are viable quick repairs you can opt for in a pinch.
Spray Sealant

Surprise! There’s a spray you can buy that takes minimal effort.
Yes, here, you will need to locate the exact location of the leaks, clean them out, and pat them dry.
Here, you can spray the sealant directly onto the hole.
However, most boaters don’t stand by this method.
First, it takes much longer to dry. If it isn’t one hundred percent dry before hitting the water, it will come off immediately. Over time, it also gets tackier to the touch.
Second, it is only effective on pinhole punctures. Anything bigger than a mosquito bite and a spray sealant won’t help any.
Lastly, most transparent spray sealants aren’t all that transparent, with some looking more like an eyesore than transparent sealant.
Packing/Duct Tape

This isn’t the most reliable technique, but for boaters in the tightest of fixest, done correctly, it might get you back to shore.
Yes, using any kind of tape that isn’t made for patching inflatables is inadvisable. You can strategically layer them on top of each other to hold up against the elements for a little bit of time.
Dry it out completely and start covering up the hole—one tape patch on top of the other vertically. Then add more tape on top, covering each seam after each layer of tape.
Again, this isn’t a permanent solution. Using any kind of tape is only to help boaters in tight fixes.
If you must use any on textiles.
How to Avoid Punctures and Abrasions for Inflatable Kayaks?

Many think kayaks sustain damage from extensive use and over-exposure to elements.
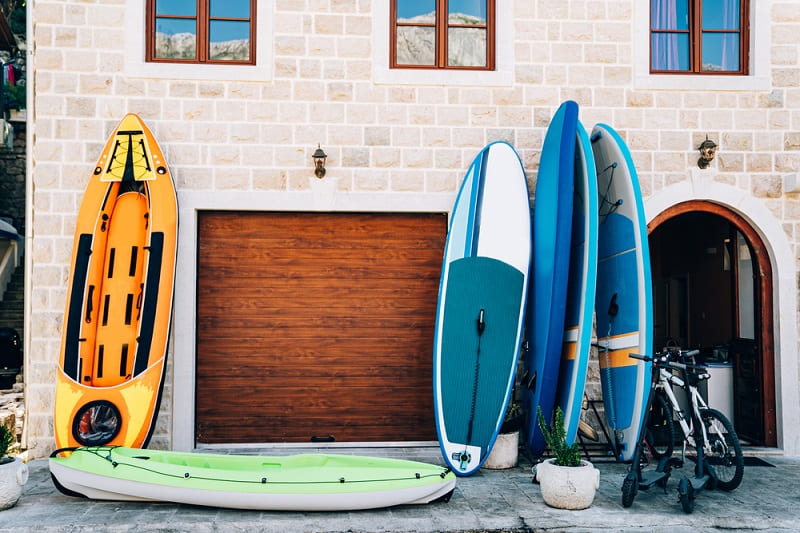
Remember that an inflatable kayak’s storage is just as necessary as the way you handle it in the water.
Don’t store your inflatables in extreme temperatures and exposed areas. It needs a proper storage space away from the elements and critters that might nib on it.
The way we handle them, from storage to water, is also essential.
Inflatable kayaks may sustain damage from being transported from one place to another. Don’t stick it with other junk when you load it into your vehicle.
Ensure it’s away from sharp objects and stored where the temperature remains consistent.
Keeping it at an appropriate temperature also lengthens the kayak’s lifespan and maintains its quality much longer.
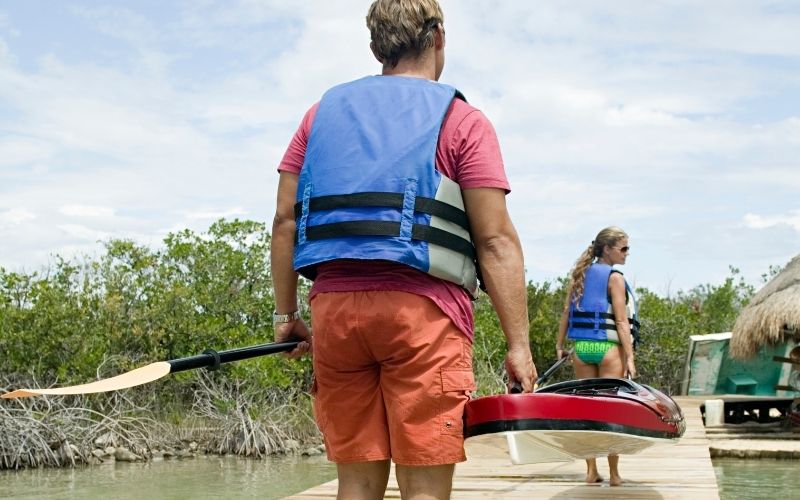
When you drag your kayak from the shoreline to the water, it will get snagged by a rock. It’s not too fragile but carrying it instead of dragging it is more advisable.
For the truly rugged kayaker, the is an affordable alternative to sturdy kayaks that are also easily repaired. Its laminated PVC body is lightweight and portable but durable enough to withstand immense heat and over 400 pounds.
If you have a little more to spend on inflatables, you can check out . It’s rigid yet versatile enough to provide comfort alongside durability. It comes with padded seats you can adjust to suit kids and adults.

I created this site to help people – to help you – with your boat problems. Instead of helping one person at a time, I want this website to be the “one-stop-shop” for everyone’s boating concerns. Read more.