With the sun shining brightly and a breeze blowing gently, you are looking forward to a successful day of fishing.
Now you want to be sure your marine battery will get you and your boat back home. But how can you test your battery to determine if it is a good or a bad battery?
First, you need to determine the appropriate type of test to use. You have heard of the remarkable accuracy of multimeters in determining if a battery is good or bad.
You have also heard about load tests and their success with car batteries. Now you want to know if a load test will work with a marine battery, as well.
The fish are waiting, so, let’s get started.
Table of Contents
Signs That a Battery Is Bad

You don’t want to wait to discover if your boat marine battery is bad until you have left the dock. So be sure to check your battery out before you go.
There are some critical signs to look for when deciding if your battery is bad. If the battery has any of these signs, it is time to get a new one.
First, is the battery keeping the electronics onboard your boat powered?
Are you having any problems with your fishfinder? Is your GPS not working? Is your bilge pump malfunctioning? Is your chart plotter inaccurate?
Are you having problems with your depth finder? If any of these instruments are not working, it is an indication that your battery may be bad and maybe the root cause.
Next, is your engine turning over quickly?
It is the job of the battery to send power to the starter. Any hesitation, engine stalling, or lack of response is a sign that your battery should be checked.
If your battery is going bad, you could be straining your starter and compounding your problem.
Even when your battery supplies sufficient power, there is still a chance that it might be bad. Inspect the battery for bulging, cracks, leakage, and broken or lose cables.
Battery bulges are a sign that the battery may have been charged too many times. Cracks and leakage are signs of a worn-down battery.
Be sure to replace broken or loose cables or terminals. This will help prevent your battery from working too hard and requiring early replacement. Even new cables should be replaced if they do not provide a firm connection.
Feel your battery to determine if it is hot. Hot batteries can lead to a burning smell, which can lead to an explosion.
Check your battery with a soon after a charge. If the voltage drops significantly, your battery is going bad.
Finally, a load test will verify your suspicion that the battery is bad. If your battery fails a load test, replace it immediately.
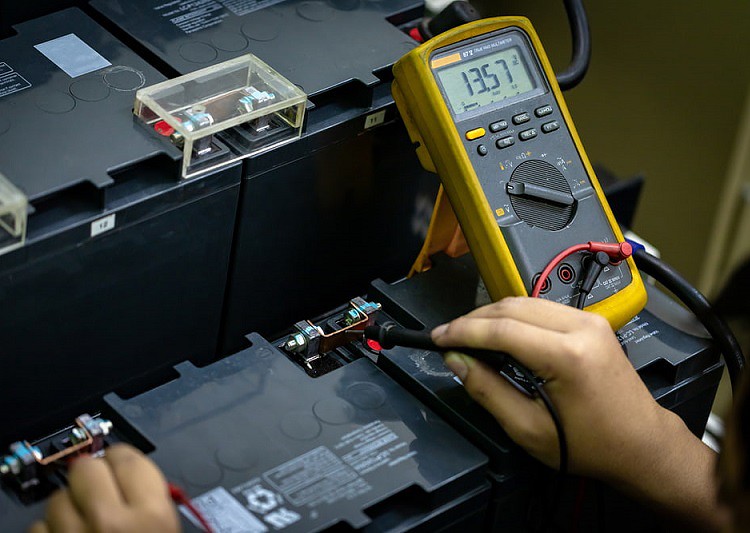
Testing A Battery With A Multimeter
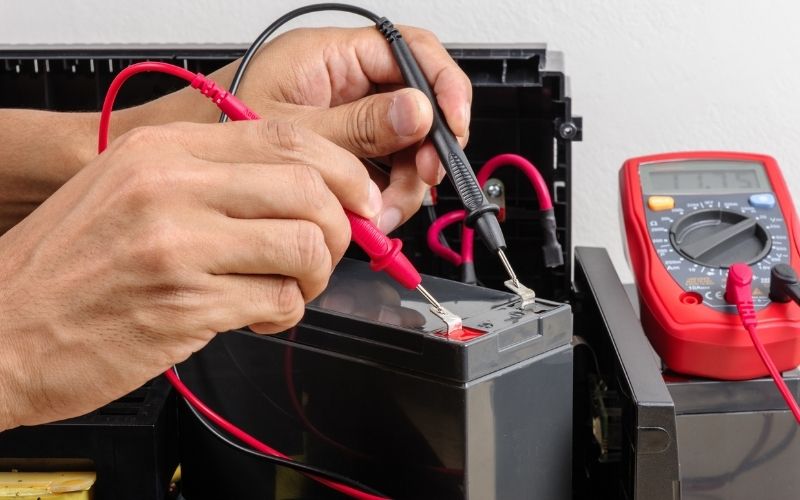

A is an excellent device to test a battery.
Before you begin your test, be sure you are protected. You will want to be protected in the event of battery leakage or even an explosion. While these are rare occurrences, they are nevertheless possible.
Wear to protect your eyes and cover your skin. Try to conduct your test in a cool area, especially if your battery feels warm or hot.
Before you begin your test, remove any battery cover. Let the battery set for at least an hour before beginning your test.
With your precautions set, the first step is to configure your multimeter. You will notice setting selections on the face of the device.
Select the “DC voltage” selection with at least fifteen volts or more. Twenty volts is the ideal choice.
Next, connect the red and black multimeter wires to the battery. Connect the red wire to the positive battery terminal. Then, connect the black multimeter wire to the negative battery terminal.
Some multimeters work automatically. If your multimeter is not automatic, simply press the “min/max” button to begin recording the battery voltage.
You can get multiple readings. The multimeter will have a scrolling function to allow you to view the different readings. Your reading should be a minimum of 12.6 to 12.8 volts.
If you are testing the battery at engine cruise speed, you can expect a higher voltage reading. In this case, look for a reading between 13.2 and 13.4, as this indicates a good marine battery.
A reading of 12.2 is a concern. At this voltage level, the electronics on your boat may not stay powered. At a 12 volt level, your electronics may not turn on at all.
This would result in an unpleasant outing at minimum, with your GPS, radio, fish finder, and other devices not working. At the extreme, you may find yourself being towed back to the dock.
When you take proper precautions, and you use your correctly, you can be confident that your electronics will work correctly, and you will make it home safely.
Take a look at this video from Dan Richard Fishing to get a visual description:

Testing A Battery With A Load Tester

Load testers are inexpensive. A recommended unit is the Steelman Load Tester. This model has a microprocessor, so you can count on an accurate reading. It is durable and includes a convenient digital display.
The purpose of a load test is to determine the ability of the battery to maintain its effectiveness, not to simply determine its charge level. It determines the amps that are produced by a battery that is charged.
When doing a load test, first be sure that your battery is charged to 100 percent. Uninstall the battery before the test. Let the battery remain idle for an entire night.
Once this idle period is complete, connect the to the battery. Connect the black wire on the to the negative battery terminal. Then, connect the positive wire to the positive battery terminal.

You will notice a selector on the with cranking amp selections. Choose the setting that is half of the cranking amps of the battery.
So if your battery has 800 cranking amps, for example, choose 400 on the load tester selector.
Push the start button on the load tester. Run the load test for fifteen seconds. Record the voltage value and the cold cranking amp reading.
Wait two or three minutes, then do the test again. You should strive for three to four tests. This will give you an adequate sample.
You are looking to see if the cold cranking amp value on the load tester decreases to 80 percent of half of the total cold cranking amps of the battery.
For example, if your battery has 800 cranking amps, one half would be 400. Eighty percent of 400 would be 320 cranking amps.
So if your load tester reading is 320 or less cranking amps, you have a bad battery.
The other critical reading is the voltage reading. If the voltage reading on the load tester goes below 12.4 volts, this also indicates that you have a bad battery.
Of course, some load testers make the results even easier for you. These have a display that simply tells you if the battery is good or bad.
Conclusion
So we have looked at three ways to tell if a marine battery is good.
Before testing the battery, be sure to wear protective clothing. Use goggles to protect your eyes and a shirt with sleeves to protect your skin.
Start by observing your battery. Look for bulges and cracks. Cracks can lead to the battery leaking. Bulges indicate the possibility of the battery exploding.
A multimeter will measure amperage and the current power of the battery. A load test will reveal if the battery is holding its power.
Consider performing the load test three to four times to get an adequate sample of the ability of the battery.
Once you know your battery is good, you can concentrate on your ultimate goal: reeling in those delicious fish in the deep blue sea!

I created this site to help people – to help you – with your boat problems. Instead of helping one person at a time, I want this website to be the “one-stop-shop” for everyone’s boating concerns. Read more.
mark
Saturday 24th of June 2023
You should always connect the positive wire first, and remove it last.