
There are plenty of guides that cover how to inflate an inflatable kayak; but what about when it comes time to deflate and pack away your boat?
Maybe you’re just getting back from your first time out on the water and you’re wondering what to do next. Or maybe your kayak molded the last time you stored it away and you’re hoping to avoid making the same mistakes this time.
Whatever the reason, you’re asking the question: how do I fold an inflatable kayak for storage?
Keep reading as we delve into the answer!
Table of Contents
How to Deflate Your Inflatable Kayak?
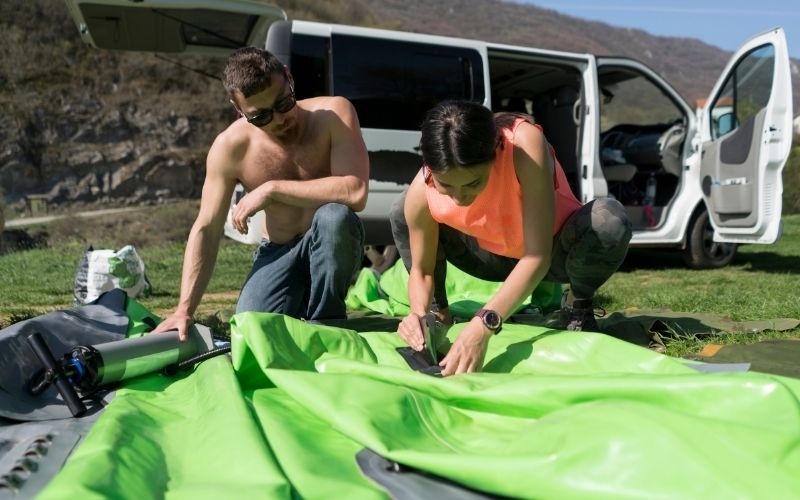
Deflating an inflatable kayak is quite easy, though if you’ve never done it before, you may want a visual on the process before you get started.

The helpful video above shows you all the basic steps of putting your inflatable kayak away, from allowing it to air dry, removing the accessories, allowing it to deflate, folding it, and packing it away for next time.
Of course, every inflatable kayak is different, and kayak designs and sizes can vary widely. Some of them may not be as simple or easy to work with as the one shown in the video.
Still, the basic steps will be the same.
So, to deflate your inflatable kayak:
- Choose a flat, soft surface: If you’ve just removed your kayak from the water and want to deflate it then and there, find a grassy spot free of debris and sharp objects. You could also use a parking area as long as there are no bits of glass or rocks.
If you’re at home after returning from a kayak trip, you can place the kayak in your yard, in a garage, or anywhere else you have a large, flat area free of sharp objects. - Make sure it’s dry and clean: If there is any mud or other objects clinging to the kayak, you may need to rinse it off with clean water before packing it away. Even if it is already clean, make sure it’s dry before you begin to deflate it.
If it’s still pretty wet, dry it off with a towel, paying special attention to cracks and corners where excess water may be hiding. If you have time and the weather is good, allow it to air dry before deflating it. - Open the side air valves: Once you’re ready to deflate the kayak, it’s best to do it one chamber at a time. Start with the side chambers. Partially open one valve at a time, then remove the valve altogether.
The air will begin to leak out of each chamber on its own. You can help it along by gently pressing on any open chambers to force more of the air out. - Open the floor air valves, or remove the floor: Once the sides are mostly deflated, begin deflating the floor. If the floor is removable or non-inflatable, you may instead have to remove the floor and fold it up separately. If it’s inflatable, deflate it as you did the sides of the kayak.
- Use an air pump in reverse mode, if desired: While it’s not necessary to use an electric air pump that sucks the air out, you can if you want to. Hook up the pump to one chamber at a time, make sure it’s in reverse mode, and turn it on so it sucks out the excess air.
How to Fold and Pack Your Inflatable Kayak for Storage?
Again, the process of folding and packing may vary for different kayak styles. Check out the following videos for how to deflate, fold, and pack specific types of inflatable kayaks:
Intex Challenger 1

Star Inflatable Kayak

AdvancedFrame Inflatable Kayak

Zray Sports Inflatable Kayak

Again though, despite some variances between kayak brands and styles, the basic process will likely remain the same. Follow these steps to fold and pack your inflatable kayak after deflating it:
- Double-check for dryness: Make sure the kayak is completely dry. Be especially mindful of the parts that have been in contact with the ground, as they may have picked up moisture from the ground while you were deflating the kayak.
It’s also a good idea to check the inside of the kayak along any cracks or crevices to make sure you got it thoroughly dry before. Moisture left in a folded up kayak can cause mold to develop, so making sure it’s dry is extremely important. - Fold the ends toward the middle: Depending on the kayak style, it’s most likely that you’ll fold both ends toward the middle. With other styles, you may instead start at one end and roll it up.
- Press out any air left in the kayak: As you begin folding, you will press the air out of the folded areas, causing it to “balloon” in the parts you haven’t folded yet. Press out these pockets of air as you fold the kayak.
- Continue folding, keeping the valves exposed: Any air left inside the kayak will escape through the valves as you fold the kayak, so it’s extremely important to keep the valves exposed throughout the process. Fold the kayak with the valves facing outward rather than tucked inside.
- Place the kayak inside your transport bag: Ideally, you will have folded the kayak to the proper size and shape of your bag. It should fit snugly inside the bag, but you should still be able to close the bag fairly easily.
Other Tips and Tricks

- Where to inflate and deflate: Kayak skins are made to be tough and handle some impacts, but they can be torn by shards of glass, sharp sticks or rocks, and other poky or jagged objects.
This is why it’s so important to choose a soft, object-free surface for deflating and folding your kayak. The kayak will sit on the ground throughout this process, and there may be times when you’re putting the pressure of your weight on the kayak to force the air out.
If there is anything sharp under the places where you’re applying pressure, the risk of damaging your kayak goes way up. - Allowing it to air dry: As noted above, any moisture left on the kayak can cause mold because it won’t be able to evaporate properly once the kayak is folded and packed. Though you can manually dry it with towels, allowing it to air dry is the most effective drying method.
This is because it allows all the moisture to evaporate naturally. If you’re using towels, you may miss some areas of moisture.
That said, if it’s a rainy day or you don’t have time or a good place to allow it to air dry, then get what moisture you can with towels. At the next best opportunity, however, it might be a good idea to unpack the kayak and allow it to air dry for a few hours. - Storing your kayak: Once the kayak is completely dry, folded, and packed, you can store it in its transport bag in your car, in a garage, or inside the house. It’s best to store it away from direct sunlight and extreme temperatures, if possible.
Conclusion
Deflating and folding your inflatable kayak is a fairly easy process, though the exact folding methods you use may vary depending on the type of kayak you have. Still, if you follow the steps outlined in this article, you should have no trouble getting your kayak packed and stored away properly.


Sarah Hood has been writing for Anchor Travel since 2021. When she’s not writing, she enjoys cooking, singing, and spending time in the great outdoors.