It can be terrifying to imagine being stranded out on the open water on your boat.
Your engine won’t start.
You don’t know who to call, or what to do next.
Luckily you can prevent that from happening (or happening again) if you only had a marine battery switch on your boat.
A marine battery switch can be your savior. If used correctly, having this switch on your boat can provide you with a backup power option.
By the end of this article, you will be able to install a battery switch on your boat, and all your neighbors’ boats for that matter.
But first, let’s learn what exactly a marine battery switch is.
Table of Contents
What is a Marine Battery Switch?
A battery switch is a very useful device to have onboard your vessel. Most people probably think about having only one battery connected, similar to your car.
But installing a marine battery switch gives you the option to draw power from two separate batteries.
How does the Switch work?
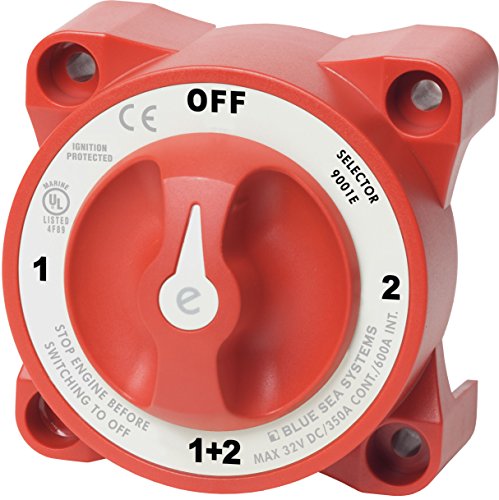
Most battery switches look like a simple knob that you turn in a circle, like a clock.
Typically there are four different settings on your switch: 1, 2, 1+2, and OFF. However, some switches only provide two settings: OFF and ON.
In general, each battery will serve a different function for you – one is only used for firing up your engine, and the other is used for giving power to the rest of your electronic devices aboard.
Those other devices may include fish finders, lights, speakers, etc.
A battery switch lets you select which battery you want to draw power from, and you can change the selection at any time.
One of your batteries will be assigned to the “1” setting on your switch, while your other battery will be assigned to the “2” setting.
With your switch on the “1” setting, you will draw power from only that one battery, likewise with the “2” setting.
The “1+2” setting will allow you to draw power from both batteries simultaneously.

Having control over which battery is drawing power can come in handy- if one battery is depleted, you can easily switch to using the other battery.
You can think of it as a backup plan of sorts.
It is only necessary to draw power from one battery at a time, instead of both combined.
If you draw power from both batteries simultaneously, you run the risk of depleting both, and you will not have a backup power option.
However, if you are trying to start your engine and your batteries are a little low on power, you can switch to the setting that uses both batteries and attempt to fire up your engine.
By doing so, both batteries can work together to give your engine that little extra push it may need to fire up.
It is recommended to draw power from each battery frequently, as this will help prolong the life of your batteries. So by using a battery switch, you can switch back and forth between batteries as often as you choose.
You do not want to go long periods without drawing power from either of your batteries- this is considered unhealthy.
Similar to the cars and trucks we drive, your boat has an alternator that will charge your battery while the engine is running. Another neat feature of a battery switch is that it gives you the option to select which battery receives the charge.
Just turn your switch to the proper “1” or “2” setting to select which battery to charge. It is recommended to interchange the two every time you run your engine to keep both battery power levels relatively equal, unless you believe one battery is significantly lower than the other.
There is also a safety aspect to these switches- a battery switch can be turned to the OFF position to immediately cut off the power to all electronics, in case of emergencies.
This is especially important if you detect a fuel leak.
Here’s what you can expect to find when looking for a battery switch
Choosing a Marine Battery Switch

There are several switches available on the market, and there are some features you may want to consider:
1. Alternator Field Disconnect (AFD)
Many switches come with this feature already, so you may just want to make sure you pick one that has it.
Your alternator can experience a surge of power if you turn your switch through the OFF position, but this only applies while the engine is running.
Instead, an AFD protects the alternator from any damage.
2. Security
Some battery switches also allow a key to lock it into position. With your battery switch locked into the OFF position, this reduces the risk of theft.
3. Specs
It is recommended to make sure you are familiar with all necessary voltage and amp ratings for your battery switch, and also for your batteries and other accessories that draw power.
You can avoid causing damage to your electronics, as well as avoid danger to yourself and others.
It would also be a good idea to pick a battery switch that is built for rough use since there is a good chance that your switch will be outside in the elements.
Now that you have selected your battery switch, it is time to install it.
How to Install the Switch?

This guide will cover how to install and connect a battery switch to two separate batteries.
If you do not have a second battery in place yet, many people prefer to use a deep cycle battery as their second battery, depending on your intentions.
These batteries are suited for powering your electronic devices, rather than just starting your engine.
You will also need to find a location for this additional battery, and you need to consider strapping it down. You do not want your battery bouncing around while operating your boat.
Material

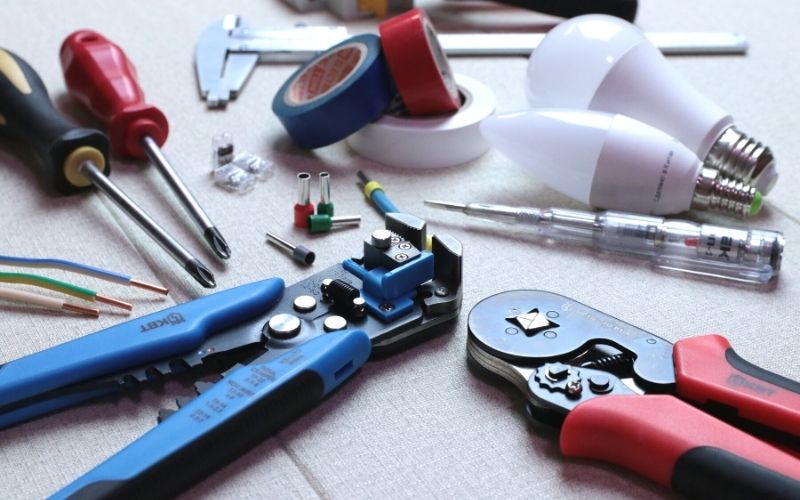
As with all electrical repairs, it is recommended to use gloves and eye protection. While you grab those, you may also consider grabbing a few more items as well. Click on the following links for recommendations:
- Gloves
- Safety glasses
- Marker
- Screwdriver
- Power drill with drill bits
- Battery cable with connector pieces
- Crimping tool
- Silicone caulk
Starting Out

It is a good idea to go ahead and remove any cables connected to your current battery, and remove the positive cable that connects to your starter.
Make sure to check any connections for rust or damage, in case they need to be replaced.
Now you need to decide where to install your switch. The location needs to be easy to access, and you may prefer it somewhat close to your batteries so you don’t have to use as much cable when you connect everything.
When you have selected your location, hold your switch against the surface and use the marker to note where the holes are, to drill correctly.
Drill your holes, but do not screw down your battery switch yet.
Running Cables
Now you need to run several cables to connect everything.
Again, each battery will be connected to the switch, with your first battery corresponding to the “1” setting on your switch, and your second battery corresponding to the “2” setting on your switch.
Be sure to turn your battery switch to the OFF position before connecting cables to the battery.
Here is what you need to connect:
- On your first battery, run a cable from the positive post to the “1” connection on the back of the switch.
- On your second battery, run a cable from the positive post to the “2” connection on the back of the switch.
- On the switch, run a cable from the “1+2” connection to the starter where your first battery connected previously.
- On your second battery, run a cable from the negative post to the negative post on the first battery.
Having Issues?
Check out this video below:
Now that everything is connected, go ahead and test out your switch. Make sure your engine starts and all your accessories power on.
If everything works as it should, finish screwing down your battery switch and apply some silicone caulk around the holes and edges. This will help prevent water from coming through.
Now that you are finished- stand back and admire your beautiful work.
Conclusion
By now you have learned how to successfully install a marine battery switch.
It wasn’t as hard as you thought, right?
Having the ability to draw power from an additional battery is a great feature to add to your boat.
This simple installation will give you peace of mind out on the water, where the only worry you will have is baiting your fishing hook or spending time with your family.
Maybe now you should consider going to the store and exploring all the cool boat accessories you can purchase and hook up to your newly added power.

I created this site to help people – to help you – with your boat problems. Instead of helping one person at a time, I want this website to be the “one-stop-shop” for everyone’s boating concerns. Read more.

