So, you’re wondering what’s the best method to remove an outboard motor from a transom? No worries, you’ve come to the right place.
There are times when you will need to remove the outboard motor from your boat. There can be multiple reasons why you would need to do this.
Perhaps you want to move your old motor to a different boat or sell it to someone. Maybe you bought a new outboard engine and want to replace your old one, or you simply want to fix your transom.
Whatever your reason for doing so may be, it is necessary to know all of the steps required to remove an outboard motor from a transom.
This article will provide you with all the crucial information on this topic. We will help you remove your outboard by providing you with all the necessary knowledge and guiding you through the entire process.
Keep reading to learn all you need to know.
Removing an outboard motor from a transom might seem tricky at first, but it shouldn’t be a big problem for anyone. If you follow our guide, you will be able to do it easily.
It is a simple process if you have all the necessary tools. Either use a branch or build a gantry, but once that is taken care of, the rest is a piece of cake.
Table of Contents
The Preparation
A transom is a vertical support that reinforces a boat’s stern. Usually, this flat end of the stern is above the water.
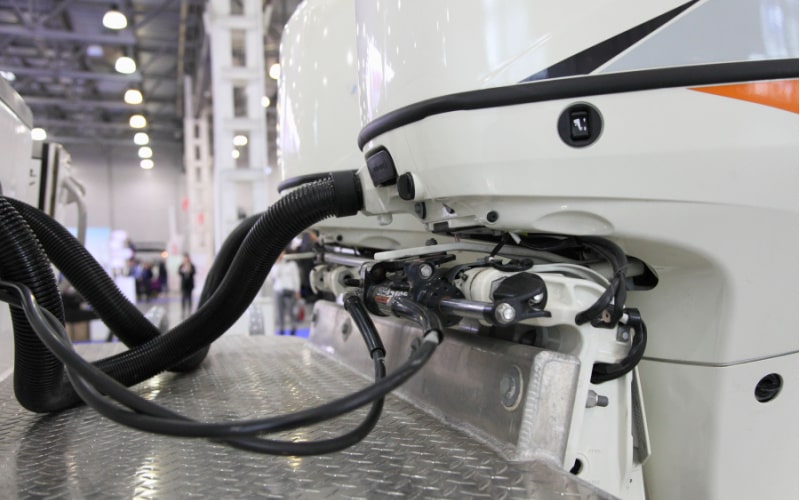
You need to prepare a few things before you can remove the outboard motor from your transom. First, unplug the steering, control, and battery lines.
Because possible buyers of the engine will need them, neatly coil and stow away the control wires (including the steering cable, if you won’t be using it again with the new power plant).
Take care of these cables even if the powerhead is blown, since parts hunters will be extremely interested in them.

Next, remove the gauges, controllers, and related wiring harnesses, but be careful not to damage or cut them.
If you maintain those old parts well and keep them properly labeled and in good condition, they may be worth more in the future.
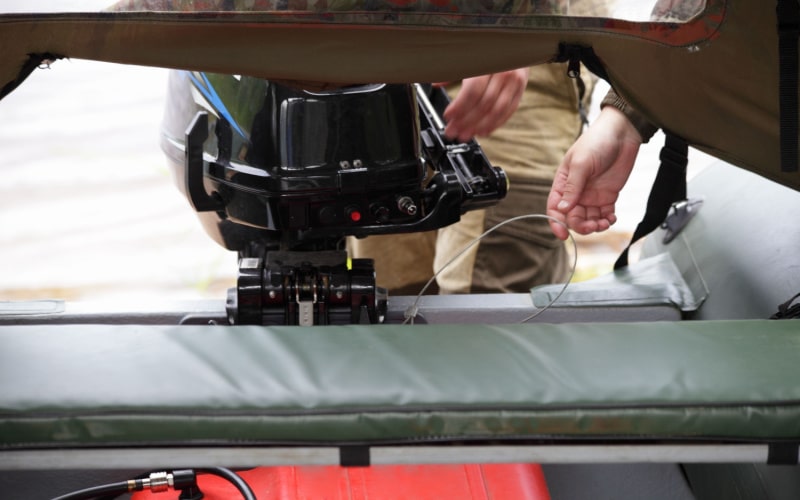
Make sure to connect a pull cord to the end of the wiring harnesses before removing them, then draw the line through the chase as you do so and leave it in place. Fishing a new harness through will be a lot simpler as a result.
The last step is to drain the engine of all fluids. You must remove the plug from the lower unit of any outboard and drain the oil.
You must empty the crankcase oil and take the oil filter out if the engine is a four-stroke. Don’t forget to drain the fuel lines and remove any internal fuel filters as well.
Using a Gantry
After the preliminary work is over, you must create some form of a gantry (a frame used for hoisting heavy objects). This is usually a wooden structure that is used to support your engine while you’re removing it.
While building a gantry may seem like a daunting task, you don’t need to worry. We will guide you through the entire process using several simple steps.
However, the easiest gantry is one that is already in place, meaning you don’t need to build it. You can use a tree instead. Some conditions need to be met, though.
The tree needs to have a branch that is at least 8 inches in diameter, and at least 2 feet above your outboard engine.
Since it is the simpler of the two methods, let’s talk about how to use a tree instead of a gantry in this section first! After that, we will guide you on how to build a gantry.
So, let’s begin our step-by-step instructions!
1. Find a Sturdy Branch


As we mentioned, this is a great way to remove the need for a gantry. If you have access to a large, sturdy tree with strong branches, you can use it instead.
Since a gantry is basically just a frame that allows you to lift heavy objects by throwing a strap over it, a tree is a perfect replacement.
The tree you use should have sturdy branches that are at least 8 inches in diameter. If it does, you are free to use this branch as a gantry.
The first step in using it as a gantry is to attach a heavy-duty strap with a high enough capacity and a come-along winch to the branch.
Position the heavy-duty strap around the tree branch so that it forms a loop. Be sure to choose a location on the branch that is free from any weak spots or signs of damage.
Thread one end of the ratchet strap or come-along winch through the loop of the heavy-duty strap, and attach a steel hook to the end of the strap.
Once you have done that, the second step is to hook the winch to the lifting eye of your outboard, and move on to the removal process described below in the ‘Removing the Outboard…’ section.
2. Find the Materials for Your Gantry
For those that aren’t lucky enough to have a tree branch they can use, here are the necessary materials needed to make a gantry:
- Two 10-foot long 4×4 wooden posts
- Four 10-foot long 2×6 wooden boards
- Two 10-foot long 2×4 wooden boards
- One 10” iron pipe
- Two ⅜” x 4” bolts
- Two ⅜” x 6” bolts
- Twenty-two
- Four
- Eight
- A drill for the bolts
- A come-along winch
- A saw (to cut the boards to the desired lengths)
3. Build the Gantry
Now that you’ve got the necessary materials, you are ready to build the gantry.
For starters, here is a nice video explaining how to build it, since it will be easier to explain with visuals (feel free to skip past the part about the wheels):

Your gantry will require a primary transverse beam, cross-bracing, and two legs.
Follow these steps:
Step 1: Take your 4×4 and stand it up vertically. Next, cut and then sandwich two 5-foot 2x6s on either side of the 4×4 at the bottom. This will be the beginning of your bracing. Secure the 2x6s to the 4×4 using two ⅜” x 8” bolts.
Step 2: You have now created a space to help you secure bracing to the 4×4. Now take your 2x4s and create a 45° angle for the outer edges of the 2x6s leading back up to the 4×4.
This should create a 90° triangle from the ends of your 2x6s to your 4×4. You will have to cut these 2×4 pieces at an angle to ensure they sit flush against the 4×4. Secure these 2×4 supports to the 2x6s using ⅜” x 8” bolts.
You should now be able to lean the 2x4s against the 4×4.

Step 3: Out of a 2×6 board, cut two trapezoid shaped-pieces that you will sandwich on either side of the 4×4, where the 2x4s meet it. Use three ⅜” bolts to secure the 2x4s to the 4×4.
Put one bolt through the 4×4 and one through each 2×4. This will complete one leg of your gantry. Repeat steps 1 – 3 to build the second leg.
Step 4: It is now time to make the beam that runs between the legs. Start by cutting and attaching 2×4 spacers on the 4×4. These will go on the sides of the 4×4 where the beam will run across vertically.
Make these spacers 10” long and attach them using ⅜” x 8” bolts. Line the spacer up with the top of the 4×4 and then bolt the spacer to it roughly 2” from the bottom of the 2×4.
Step 5: Take your 2×6 boards and cut two lengths of them down to 8 feet. These will act as your crossbeam. Attach both of these boards on either side of the 4×4 with four ⅜” x 10” bolts, two on each side.
Step 6: Now we have to brace the gantry’s crossbeam to the legs. We will do this in a similar manner to the bracing done in steps 2 and 3. Take two pieces of 2×4 and run them at a 45° angle from the legs of the gantry to the crossbeam.
You will want one brace attached to either side of the crossbeam. Attach the brace to the legs using ⅜” x 6” bolts and to the crossbeam using ⅜” x 4” bolts. You may have to do some creative trimming to improve the cosmetic look in this step.
Step 7: We are almost done! Cut two 2x4s down to 15” long. Drill a 1-⅛” hole in the center of both of these boards. Next, secure these boards on either side of the middle of your crossbeam, with the holes facing one another.
You should secure these boards to the crossbeam using ⅜” x 12” bolts. There are two reasons for doing this–the first is so that you don’t have to drill holes into the crossbeam itself. The second reason is to lift the chain hoist a little higher up on the gantry, hiding the hoist behind the beam.
Step 8: Now, simply lift the chain hoist to the center of the crossbeam and slide your 1” iron pipe through the predrilled holes and safety hook of the hoist. And that’s it.
As soon as your gantry or tree branch is prepared for the engine removal, hook your towing vehicle to the trailer and back the boat into position so the outboard is centered underneath it.
The come-along winch allows you to hook up the motor and lift it off the transom easily. Let’s move on to the final part of this process!
Removing the Outboard Motor From the Transom

Now that your gantry is set up, the rest should be easy. However, we advise you to still pay close attention.
Once you’ve taken care of the gantry (or a tree), make sure to attach a come-along winch to the transverse beam as we mentioned earlier.
If you don’t have a come-along, there is no need to panic. They are quite affordable, and even tiny ones should have enough capacity for the task at hand.
There will be a hook on the end of the come-along that you use to fasten to the lifting eye of the engine.
Depending on the model of outboard you’re moving, the lifting eye will either be permanently fixed under the cowl or you will need to purchase an eye that screws into the top of the engine.
If you can’t find the lifting eye, try checking the manual.
Once everything is connected, you are ready to move on with the removal of the outboard motor.
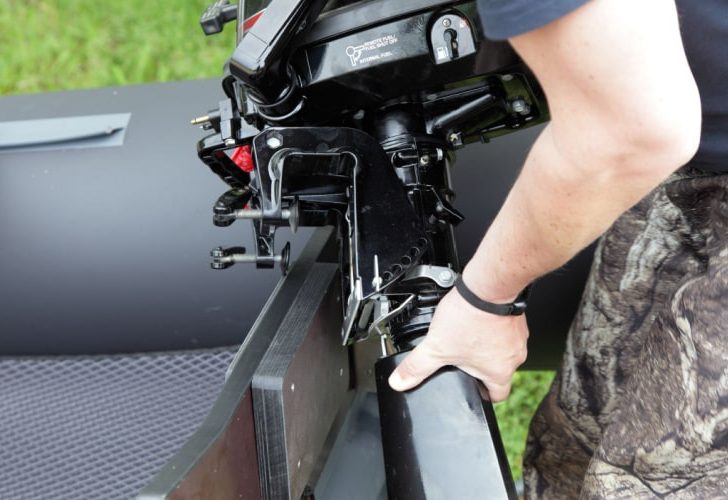
You can now begin to remove the nuts holding the bolts through the transom and motor mount. Managed to get them off? Great job!
The motor will still be hanging onto the transom under its own weight now. You will need to rock the motor gently to loosen the bolts in order to be able to remove it by yourself.
If you manage to completely loosen these bolts, remove them, and you will be able to lift the motor from the transom. There you have it, your outboard is now removed.
However, in a lot of cases, the bolts will still be under a lot of pressure, making it impossible for you to simply remove them. This means that you will need a partner for the following step.
A person holding the motor should gently swing the lower unit back and forth as you slowly advance the boat forward to wiggle the bolts loose without damaging the mounting holes.
Keep in mind, you should be advancing the boat extremely slowly and that person should only rock the lower unit of the engine lightly. This will give you the small push needed to easily remove the bolts.
Here is a video that details the removal process:

After completing this process. You can lift the engine off the transom, and then you can keep advancing the boat slowly and the engine will be completely removed.
Things to Watch Out For
Once the engine is removed, make sure to store it properly. You should plug the oil tank line at both ends, meaning the engine and the oil tank end. This will prevent leakage and unnecessary air intrusion.
You do not want to let too much air get into the oil circuit.
Once you are ready to reinstall your outboard motor (or install a new one), make sure you are using the right clamps for the fuel and oil lines. Avoid using straps or worm clamps.
During the reinstallation, you should check the fuel line of your outboard. Also, check the primer bulb, as it might need to be replaced.
Check out the condition of the throttle cables as well as the shift. You might also want to take some time to arrange your wires and cables neatly. Perhaps use a rigging tube; it should help keep things organized.
The reinstallation process is a nice opportunity to correct any deficiencies that were present before you removed your outboard motor.
Conclusion
There you have it – the simplest way to remove an outboard motor from a transom.
While this process may seem tricky at first, you should manage to figure it out in no time. Simply follow all of the steps in this article to easily remove your outboard motor from a transom.
Hopefully, this article helped ease your worries and you managed to learn a new skill that will surely help you in your sailing adventures!

I created this site to help people – to help you – with your boat problems. Instead of helping one person at a time, I want this website to be the “one-stop-shop” for everyone’s boating concerns. Read more.