Want to build a DIY floor for your boat but all you find are complicated guides?
I hear you.
These guides were made for handy-men who already know exactly what they’re doing, NOT first-timers.
If you’ve never done anything like this before, you could make a lot of costly mistakes. Or, you might not get anything done at all!
That’s why I’m here to help.
Today, I’ll show you
- The EASIEST step-by-step guide to building an inflatable boat floor
- Tips and tricks to take your floor to the next level
All of this in layman’s terms, so you’ll go from clueless to expert in one article.
Let’s dive in.
Table of Contents
The Easiest Way to Build an Inflatable Boat Floor
If all you want is to be able to stand up while fishing – or bring that cooler along – follow these 5 simple steps.
Step 1: Gather Materials
For this project, you’ll need:
- ½” Marine plywood – Make sure you get one that’s slightly longer and wider than your boat.
- Drop cloth – For creating the perfect outline (you can also use cardboard).
- Electric saw – Get a circular saw or jigsaw to cut your plywood into shape.
- Sandpaper – For fine edges.
You can get all those at your local hardware store. Or, you could buy them online.
Table could not be displayed.Step 2: Measure Floor
The first thing you need is an exact measurement of your floor.
To do this, flip your boat over.
You should see the seam where the floor and the main tubes are sealed together.
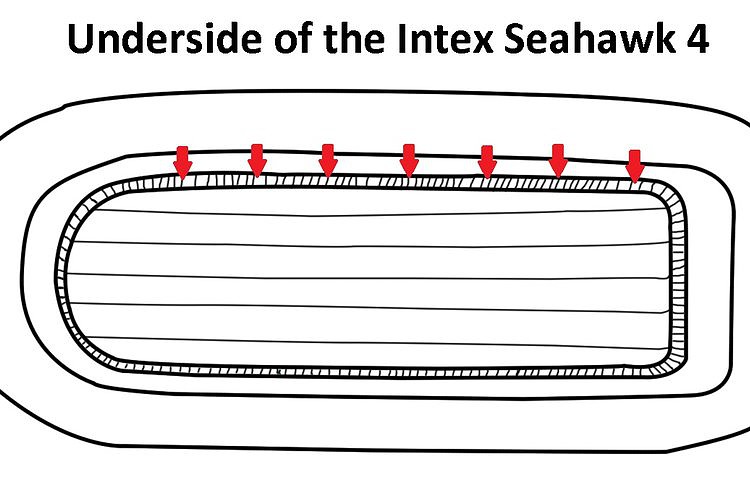

If you flip your boat over, you’ll see the seam where the floor meets the main tubes
Next, take your drop cloth and wrap it tightly around your boat. Taping it down will help you a lot here.
Then take a marker and trace this seam. Make sure you trace on the inside of the seam rather than the outside.
After tracing, cut out your drop cloth tracing. This will give you a precise model of your floor – right down to the smallest curves.
Lastly, place your drop cloth cut-out on your plywood and trace the measurements into the wood.
Step 3: Cut Plywood
With the exact measurements marked into your plywood, you’re ready to get cutting!
Find a solid, flat surface to rest your plywood. Then take your saw and shave the wood to its perfect shape.
Don’t know how to use a power saw? Check out this video:

You can also use a hand saw. But hey, you’ll need some skills to get that one straight.
Step 4: Sand Edges
The last thing you want is a splinter puncturing your boat.
To prevent this, sand all the edges of your fresh cut-out.
Scrape and scrape until everything smoothens out.
To test, rub your fingers along the entire edge. Feel for any bumps or overly rough areas.
Step 5: Enjoy!
Once you have that perfectly-shaped smooth plywood, all there’s left to do is put it on your inflatable and you’re done.
To insert, pump up the air floor, slide your floor in, then pump the main tubes.
Your floor should fit snugly in your boat.
Now get out on the water and enjoy!
Easy isn’t it?
Tips and Tricks for The Best Inflatable Boat Floor
While that method is the easiest way to get things done, it has a lot of room for improvement.
If you have the time and the skills, a few additions can drastically improve the lifespan of both your floor and boat.
Here are 4 tips and tricks to take your DIY floor to the next level:
1. Use Primer
Marine plywood was made to withstand wet and humid conditions. But this doesn’t mean it’s invincible from water damage.
If your plywood floor gets wet over and over again, it will rot eventually.
To stop this, use a waterproof primer.

After you’ve cut your plywood to its perfect shape, paint the primer on. Add one or two coats to completely stop water from getting in.
Then, let that dry for one to two days before doing anything else.
You can double, triple, or even quadruple the lifespan of your floor with this one easy trick.
2. Add Carpet
Is your floor too hard?
Do you want an extra layer of water protection?
Does your floor look ugly?
There’s one solution to these three problems: add a carpet.
When you add a carpet to your plywood floor, it’ll:
- Make the floor softer and more comfortable
- Block any water from even touching your plywood
- Give your floor a beautiful and professional look
To add this, you’ll need two things:
An outdoor carpet…

And some carpet glue.

After the primer has dried, take your carpet and cut it to size.
Then, add a layer of carpet glue to your plywood and gently stick the carpet on.
Next, flip the floor over and work on the other side.
When the glue hardens, you’ll have a carpeted boat floor ready for action!
3. Insert Insulators
Another upgrade you can add is insulators.
Not to keep your floor warm of course, but to give it safe edges and a snug fit.
Yes, sanding should take away all splinters. But wood on inflatable material is never a good idea. With an insulator in between, you can be sure nothing will go wrong.
To do this, take a few insulators (enough to cover your floor’s edges)…

Cut them down one side (if they’re not already cut)…
And stick them around the edges of your floor.
You’ll want to do this after you’ve added the carpet.
Note: Adding insulators will make your floor about ½ thicker. If you plan to do this, cut ½ inch deeper all-around when shaping your plywood.
4. Slice Floor
As sturdy as they are, 8-foot floors aren’t the most convenient things to bring along.
To make them portable, slice them up!
Instead of using one solid piece, cut it in half or into thirds. This will make packing up and carrying your hard floor much easier.
But be careful. The more you cut your floor, the less sturdy it will be (that’s why I don’t recommend cutting it into more than three pieces).
To cut, all you need to do is draw a line in the halfway (or every ⅓ ) mark of your plywood. Then take your saw and slice it through.
You want to do this right after shaping your floor, before adding a primer or carpet.
Note: If you are going to slice your floor, I highly recommend using insulators in the finished product. This will help hold the floorboards flat as you step on them.
Want to See How It’s Done?
Check out this video to see how it’s done:

Conclusion
Everybody has their own way of building an inflatable boat floor.
There are a lot of tricks others use that I wouldn’t recommend (such as using staples).
But with this easy 5-step method and 4 tricks for improvement, you should get an excellent floor every time!
Have a question? Need clarification? Want to share your own tricks? Leave a comment below!

I created this site to help people – to help you – with your boat problems. Instead of helping one person at a time, I want this website to be the “one-stop-shop” for everyone’s boating concerns. Read more.